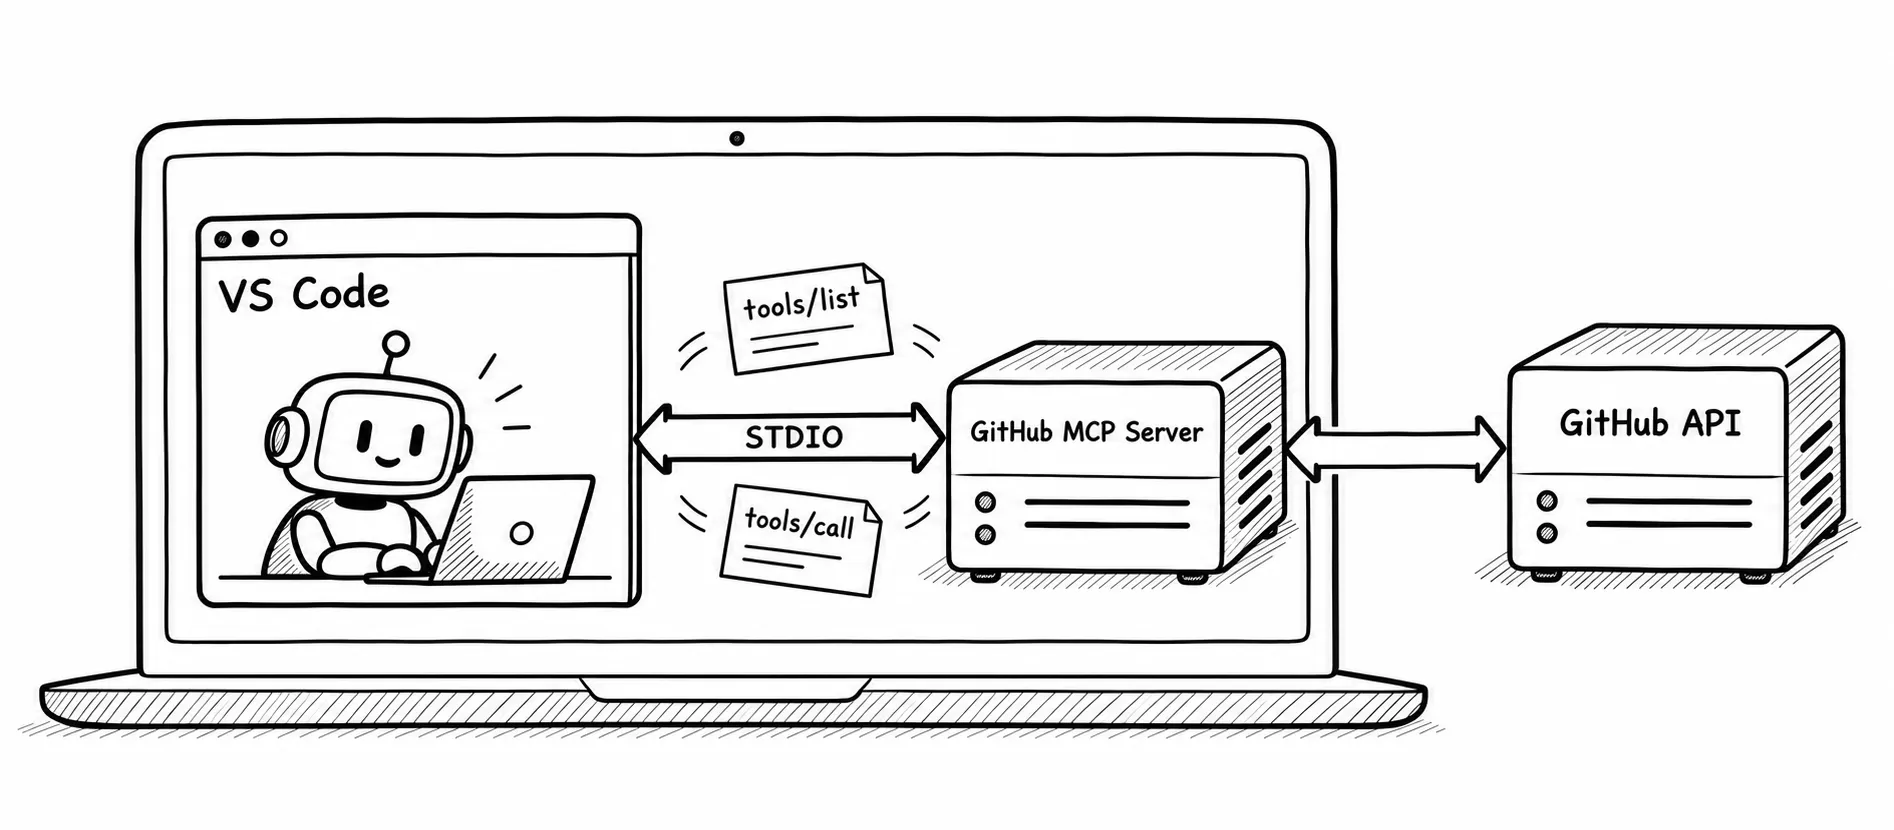
We’re seeing MCP servers pop up from organizations across software development, retail, finance, healthcare, and entertainment at an unprecedented pace. And there’s no shortage of content covering the protocol: the good, the bad, and every opinion in between.
In this post, I’m taking a slightly different approach. Rather than jumping straight into the protocol itself, I’ll unwrap MCP layer by layer, starting from the user experience, then moving into the protocol internals. The GitHub MCP Server is our example today, which makes this very much a developer-focused walkthrough.
So, without any further ado, let’s start our walk.
This post is based on the 2025-03-26 version of the MCP protocol.
The experience
To begin, I created a simple React application in VS Code using GitHub Copilot, purely through natural language instructions:
Create a React web application using the default Vite template
Other than the prompt, I didn’t touch the code at all. My next step was to create a proper README file, set up a GitHub repo, and commit and push the project, again, all through natural language. To do this, I installed the GitHub MCP Server as a Docker container running locally by adding this configuration snippet into the VS Code user settings file.
The GitHub MCP Server requires two things:
- A Docker runtime (Docker Desktop or Rancher Desktop)
- A GitHub PAT token with permission to create repositories and commit/push
What is my GitHub id?
At this point, GitHub Copilot understood it needed to run a tool called get_me, exposed by the GitHub MCP Server. And here’s where an important principle of the MCP protocol shows up in action: the agent explicitly tells you what it’s about to do and asks for your consent before proceeding.
This is a core design principle of MCP. Users should always know what is happening with their data, and they should control what is shared and what actions are taken. Host applications must surface clear prompts that let users review and approve before anything executes.

Once I gave permission, Copilot ran the tool and returned the result in natural language.

Next, I asked it to create a new repository:
Create a GitHub repo caleld unwrapping-mcp-github
(Well, it wasn’t intentional, but I made a spelling mistake there — yet the LLM still understood exactly what I wanted.)
GitHub Copilot asked for consent to run create_repository tool.

Once I confirmed, it returned the URL of the newly created repo.

Finally, I gave one instruction to wrap everything up:
Create a proper README file, commit and push this code into the newly created repo
This time, Copilot had to perform multiple tasks and asked for explicit approval at each step. At the end, it confirmed everything was pushed. You can see the final result here.

That’s a complete React application — created, documented, and published to GitHub, entirely through natural language. And along the way, we saw the consent model that sits at the heart of MCP’s design.
MCP roles: hosts, clients, and servers
Before moving into the protocol internals, let’s look at the three roles MCP defines, because understanding these makes the rest of the walkthrough much easier to follow.
-
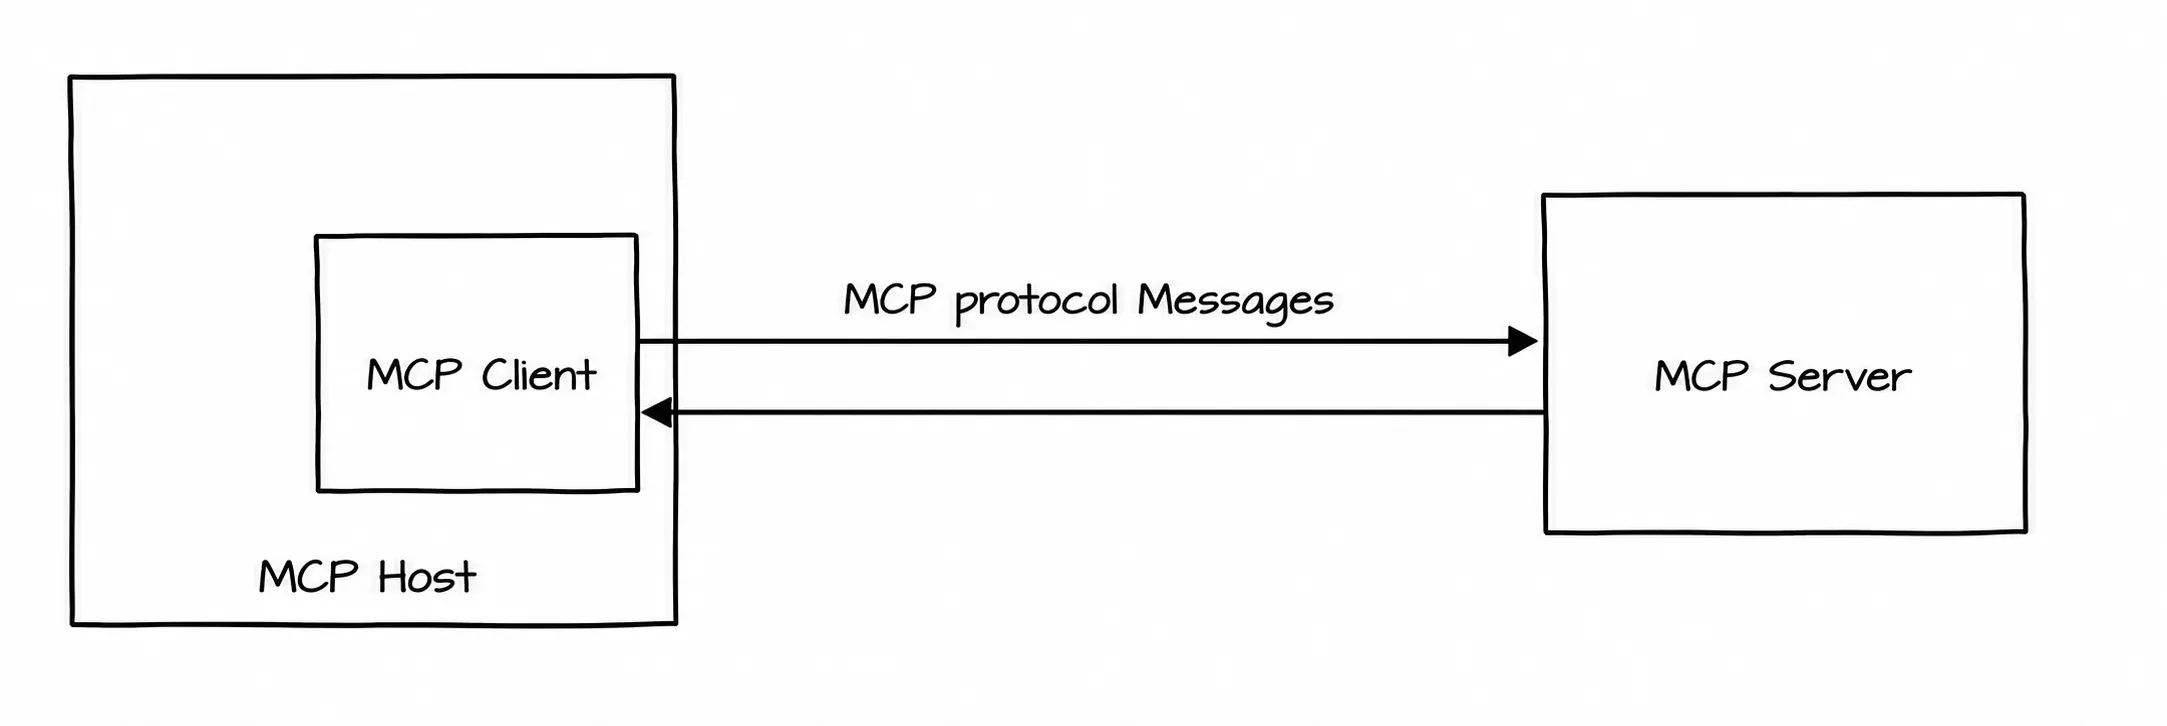
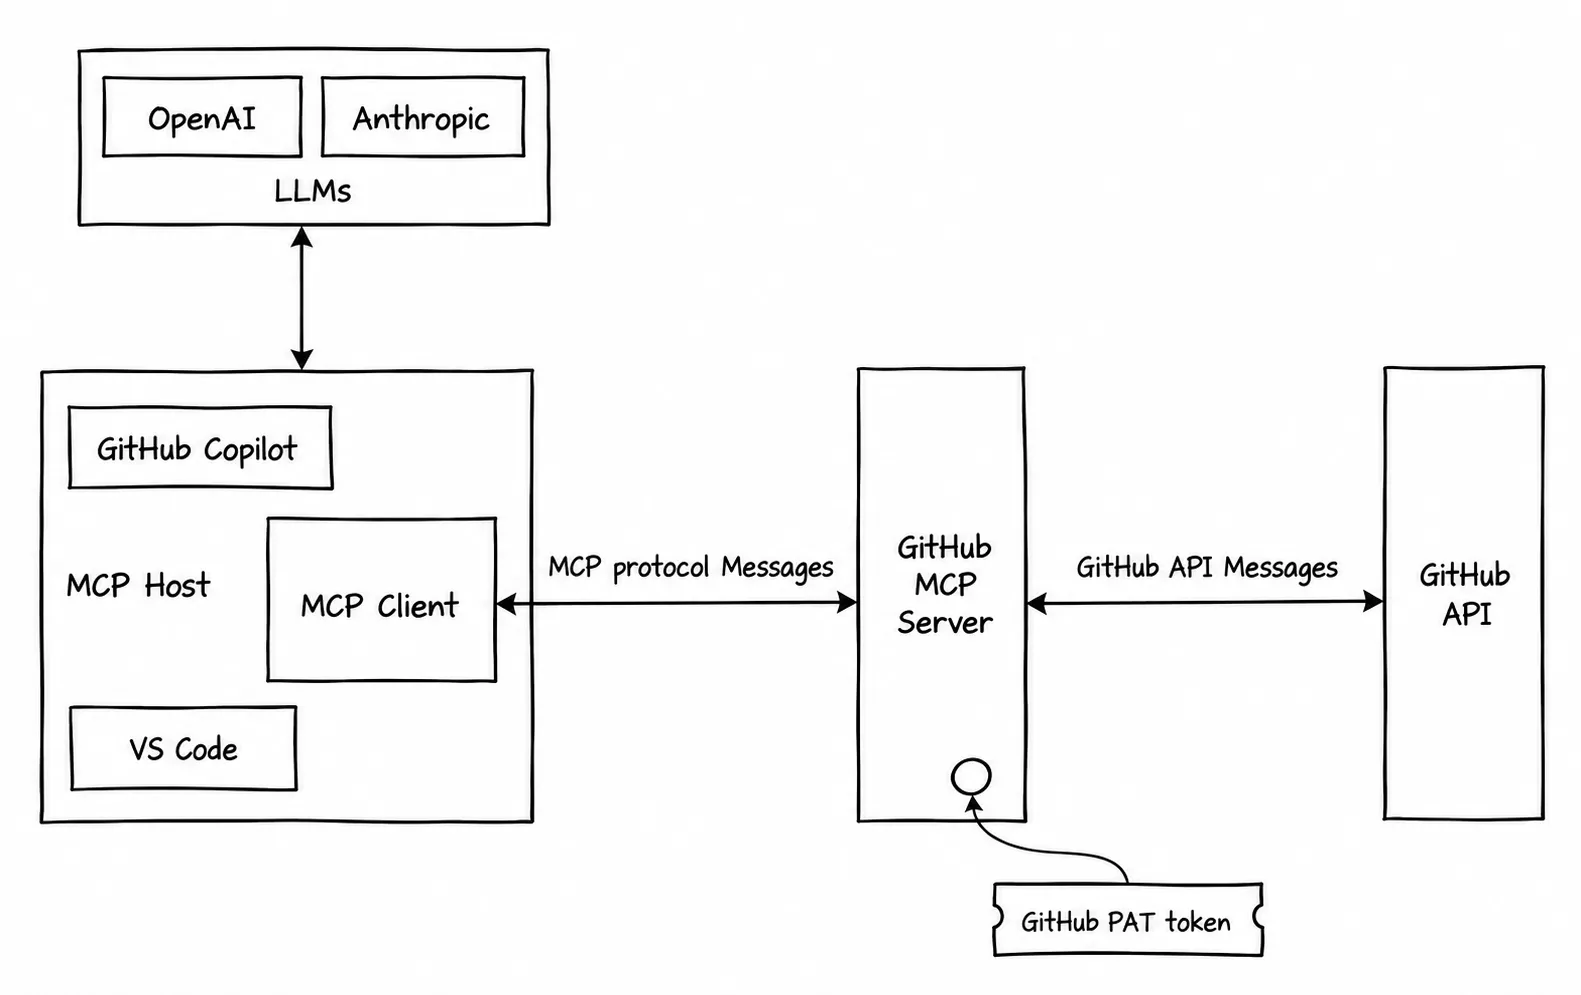
Hosts - the agent applications that create and manage client instances. They handle connections, apply security policies, aggregate context across multiple clients, and manage user authorization decisions. In our example, VS Code is the host. Other examples include Claude Desktop, Cursor, and Windsurf.
-
Clients — connectors within the host application. Each client connects to a specific MCP server and maintains a 1:1 stateful session with it. Clients route protocol messages in both directions between the host and the server.
-
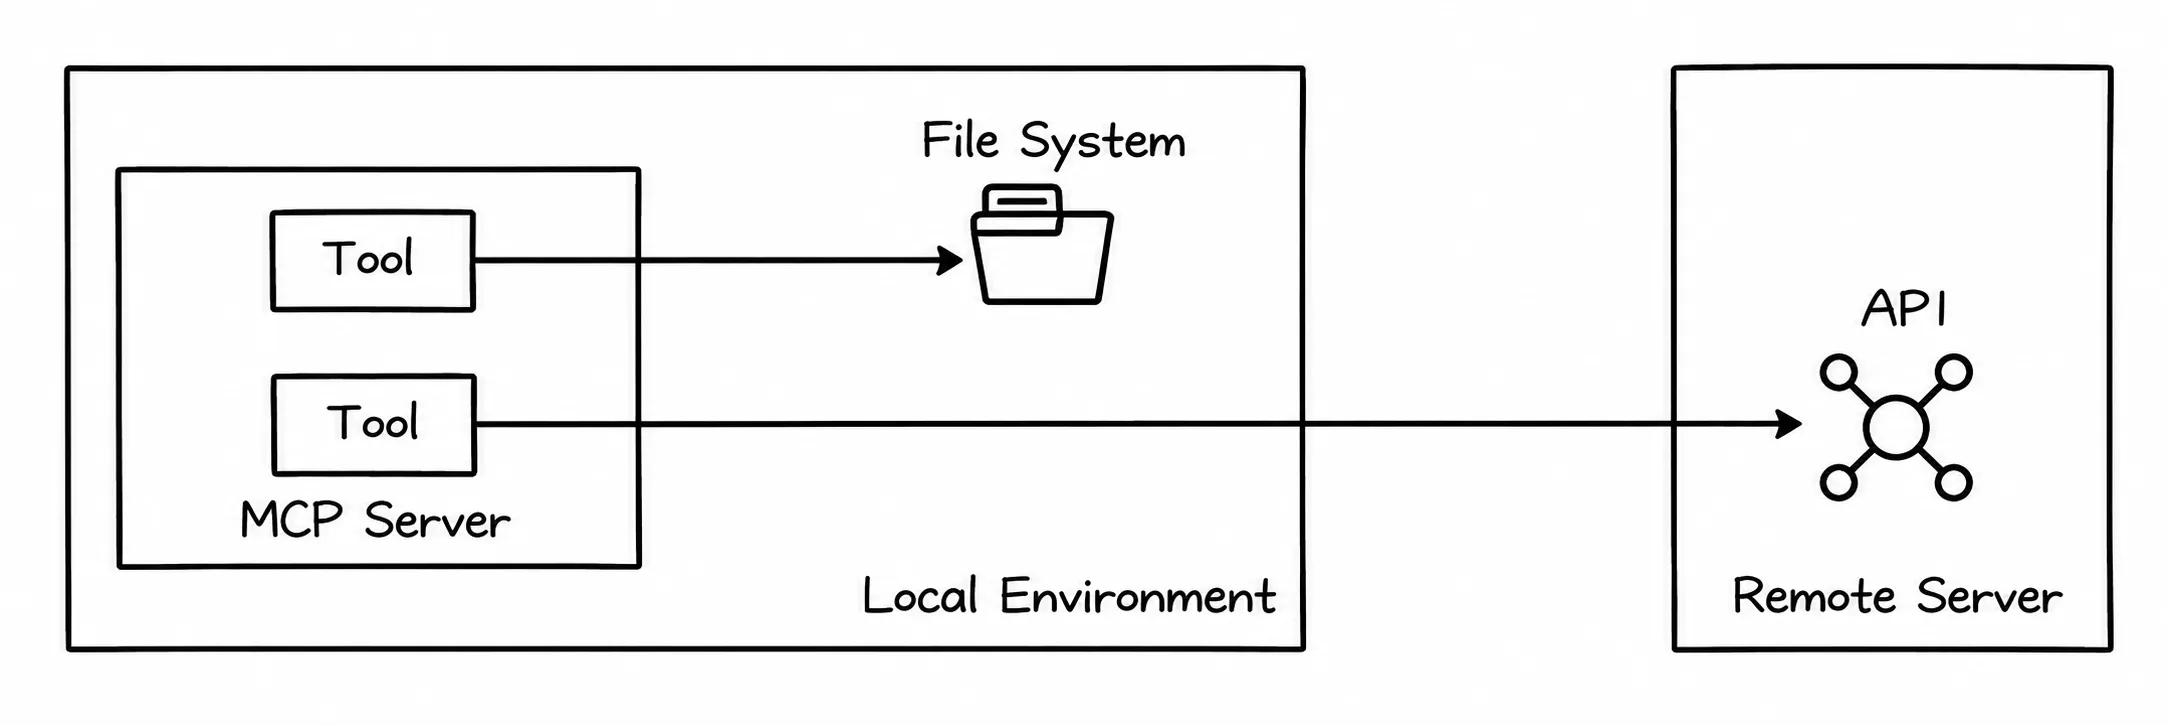
Servers — provide context and capabilities via the MCP protocol. These can live in the local environment (accessing your file system or a local database) or offer remote access (like the GitHub MCP Server communicating with GitHub’s APIs).
The diagram below shows how all the components work together in our example use case at runtime.
At this point, one can ask a very valid question: given that the GitHub API is being called at the end of the day, why not just call it directly? Why invent a new protocol like MCP when GitHub SDKs and even Terraform modules already make these integrations relatively straightforward?
It’s a fair question. The answer comes down to three things MCP provides over direct API integration:
-
Standardization — MCP acts as a universal connector, much like USB-C. Instead of building and maintaining separate connectors for every proprietary API, you integrate once with MCP and reuse that across multiple projects and models. In the exercise above, we didn’t write a single line of code or touch any SDK.
-
Capability discovery for LLMs — MCP enables LLMs to automatically discover what capabilities a server offers. This means AI applications can dynamically understand and use new functionality without manual prompt engineering or hardcoding. The result is applications that are more adaptive and extensible out of the box.
-
**Security and maintenance **— With authentication, access control, and data retrieval managed centrally through MCP, there’s no need to scatter credentials or intermediary data across different systems. Compliance and security posture improve as a result.
The spec summarizes the purpose of MCP this way:
Model Context Protocol (MCP) is an open protocol that enables seamless integration between LLM applications and external data sources and tools. Whether you’re building an AI-powered IDE, enhancing a chat interface, or creating custom AI workflows, MCP provides a standardized way to connect LLMs with the context they need.
The messages and the flow
Now let’s move one layer deeper looking at the actual messages exchanged and how the protocol flow works.
To do this, I connected the GitHub MCP Server to MCP Inspector, a debugging tool that lets us observe message-level interactions clearly. You can run both locally. Instructions for configuring and connecting them are here if you want to try it yourself.

Resources, prompts, and tools
An MCP server exposes three types of capabilities: Resources, Prompts, and Tools.

- Resources (structured data for context) — application-controlled data sources that servers expose to clients, giving LLMs access to external content as context. These can be files, database records, API responses, logs, images, or anything else the model might need. In our case, the GitHub MCP Server exposes resource templates for interacting with GitHub artefacts.

-
Prompts (predefined templates for optimal use) — user-controlled templates that guide how LLMs interact with tools or resources. They let developers ensure the AI uses external data or functions in the most effective, structured way.
-
Tools (model-controlled functionality) — functions that LLMs can call to perform specific actions, similar to function calling or API invocation. The GitHub MCP Server exposes a significant number of tools — we used several of them in the experience section above.

The connection lifecycle
MCP is a stateful protocol. It defines a connection lifecycle between client and server in three phases.
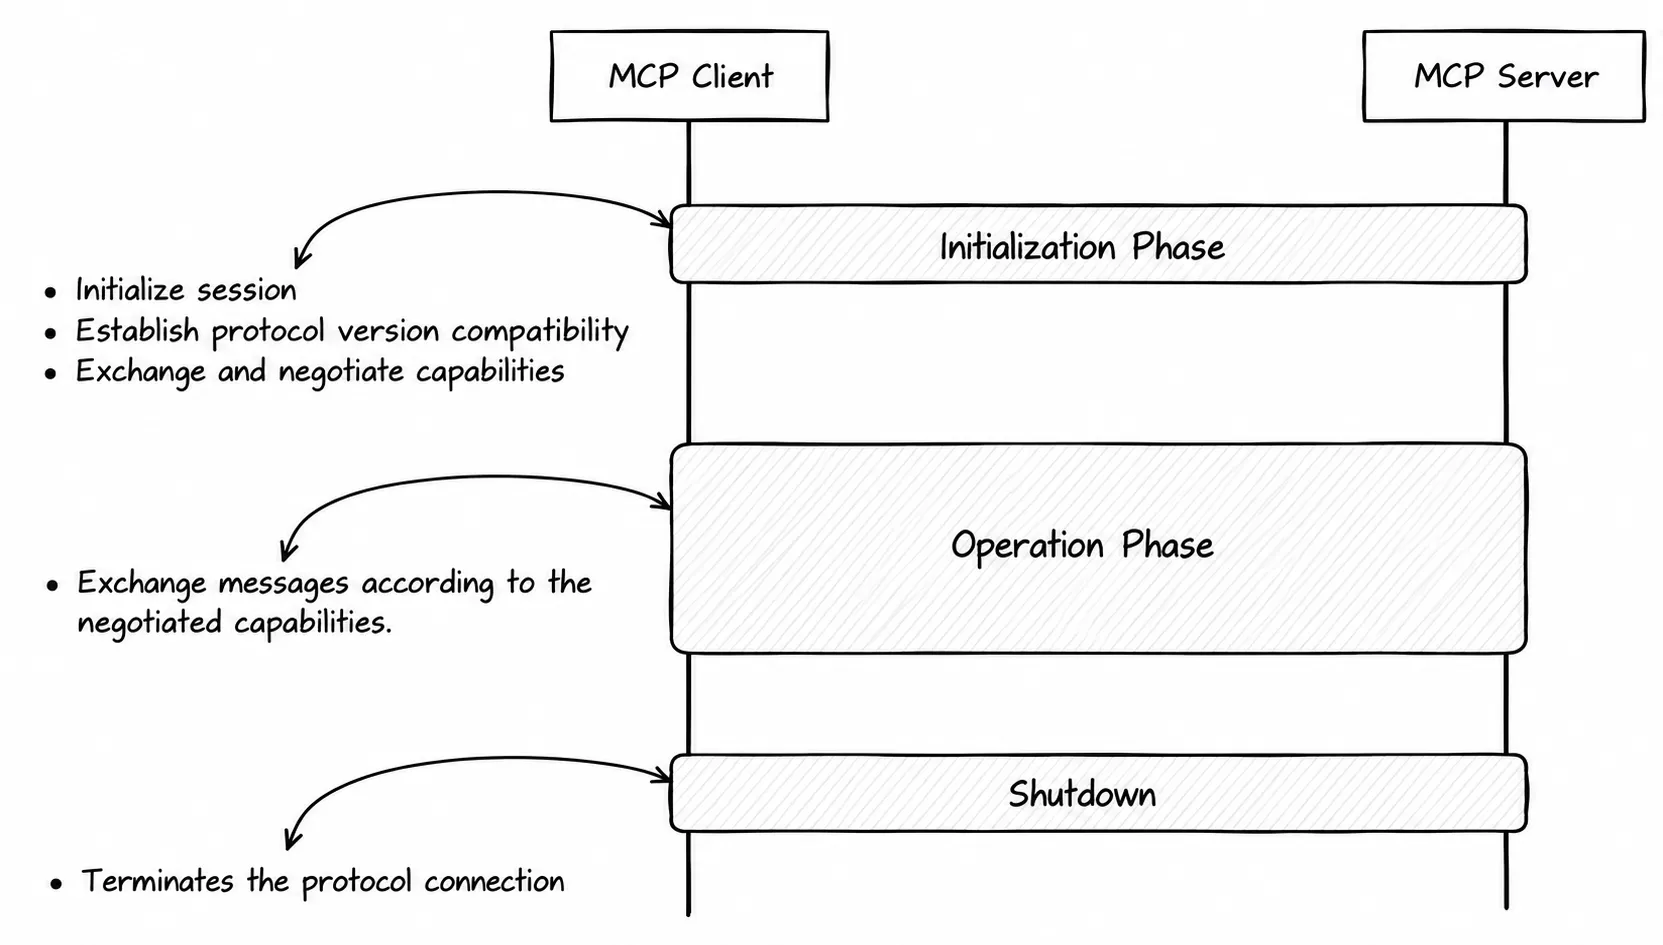
Phase 1 — Initialization
The client and server agree on a protocol version and exchange capabilities. The server declares what it supports: resource subscriptions, tool support, prompt templates. The client declares its own capabilities: sampling support, notification handling. Both parties must respect the declared capabilities for the entire session. MCP uses JSON-RPC as its messaging format.
Here is the initialize request MCP Inspector sent to the GitHub MCP Server. Since Inspector is a testing tool rather than a production client, it sent no capabilities:
{
  "method": "initialize"
}
The GitHub MCP Server responds with its capabilities and version information:
{
  "capabilities": {
    "logging": {},
    "resources": {
      "subscribe": true,
      "listChanged": true
    },
    "tools": {
      "listChanged": true
    }
  },
  "serverInfo": {
    "name": "github-mcp-server",
    "version": "v0.2.1"
  }
}
Phase 2 — Operation.
Once the session is established, the client and server exchange messages based on the negotiated capabilities.
To see available tools, invoke the tools/list method:
{
  "method": "tools/list",
  "params": {}
}
The server returns the full list of tools. The GitHub MCP Server exposes quite a large number of tools and the response below is truncated:
{
  "tools": [
    {
      "name": "get_me",
      "description": "Get details of the authenticated GitHub user. Use this when a request includes 'me', 'my'...",
      "inputSchema": {
        "type": "object",
        "properties": {
          "reason": {
            "description": "Optional: reason the session was created",
            "type": "string"
          }
        }
      }
    }
  ]
}
To call a specific tool, invoke tools/call with the tool name as a parameter:
{
  "method": "tools/call",
  "params": {
    "name": "get_me",
    "arguments": {}
  },
  "jsonrpc": "2.0",
  "id": 5
}
The GitHub MCP Server returns your GitHub username and account details.
{
  "method": "tools/call",
  "data": {
    "content": [
      {
        "type": "text",
        "text": "{\"login\":\"sagara-gunathunga\", …}"
      }
    ]
  }
}
Phase 3 — Close.
One of the parties closes the connection to terminate the session.
Just to be clear: with production host applications like VS Code or Claude Desktop, you never need to craft these messages manually or invoke tools yourself. When you provide a prompt, the application, with the help of the LLM, automatically selects the right tool, constructs the messages, and manages the entire client-server session. What we’ve done here is lift the hood to see what’s happening underneath.
MCP transports
MCP uses JSON-RPC to encode messages, and all messages must be UTF-8 encoded. The protocol currently defines two standard transport mechanisms:
- STDIO — communication over standard input and output
- Streamable HTTP and SSE
Custom transports are also possible in a pluggable fashion.
Both exercises in this post: VS Code and MCP Inspector used STDIO transport. Let’s look at how it works. HTTP transport is a separate discussion, covered in the next post in this series.
STDIO stands for standard input/output, the fundamental way processes communicate by reading and writing through streams provided by the operating system. Standard input (stdin) reads data; standard output (stdout) writes it.
When an MCP server runs as a subprocess, it reads client requests from stdin and writes responses to stdout. The client and server exchange messages directly through these streams.
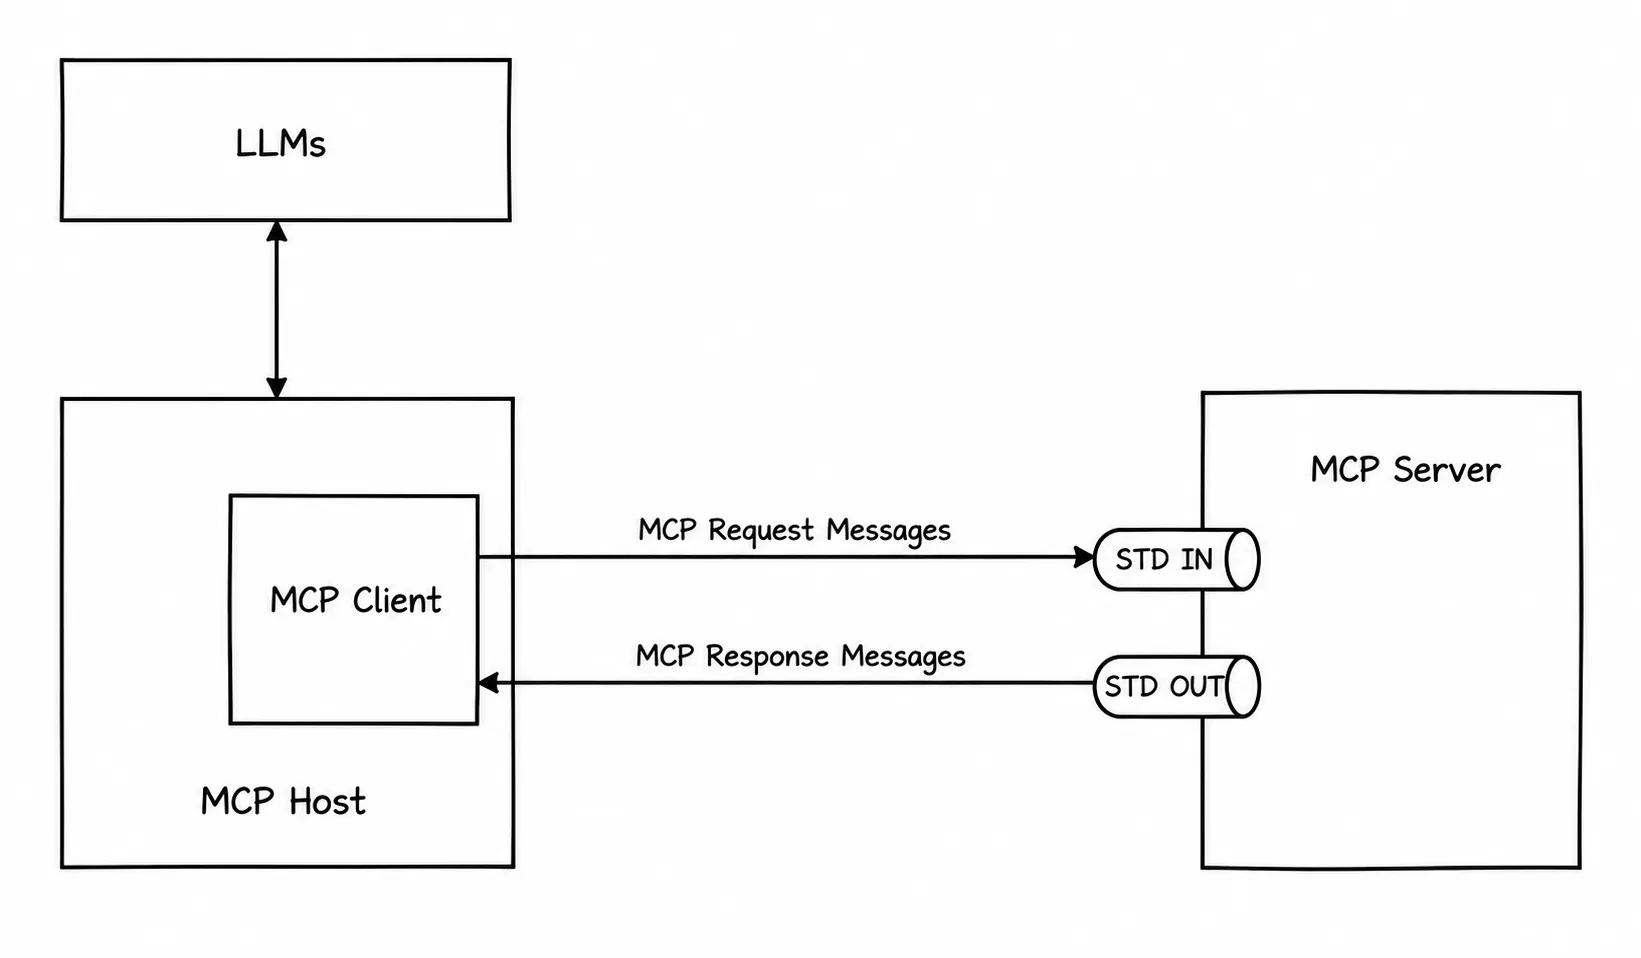
STDIO is generally recommended over HTTP/SSE for local integrations because it’s simpler, more efficient, and more secure. It gives you direct, low-latency, bidirectional communication between two processes on the same machine with no network overhead, no server setup, and no OAuth requirements. It’s the right choice for tightly coupled local environments where the client and server run side by side.
Wrap up
We started by watching MCP in action by creating a complete React application and pushing it to GitHub entirely through natural language in VS Code. Then we connected the GitHub MCP Server to MCP Inspector to observe exactly what happens at the message level: the initialization handshake, capability exchange, tool discovery, and tool invocation. Finally, we covered the transport layer and why STDIO is the natural fit for local integrations.
Everything we discussed is common to any MCP server, and GitHub was just our example. The protocol, messages, lifecycle, and transport mechanisms work the same way regardless of which server you’re connecting to. That’s the whole point of MCP.
Hope this is helpful and stay tuned for the next post where we take the next step: connecting to a remote MCP server over HTTP, where security gets real.